
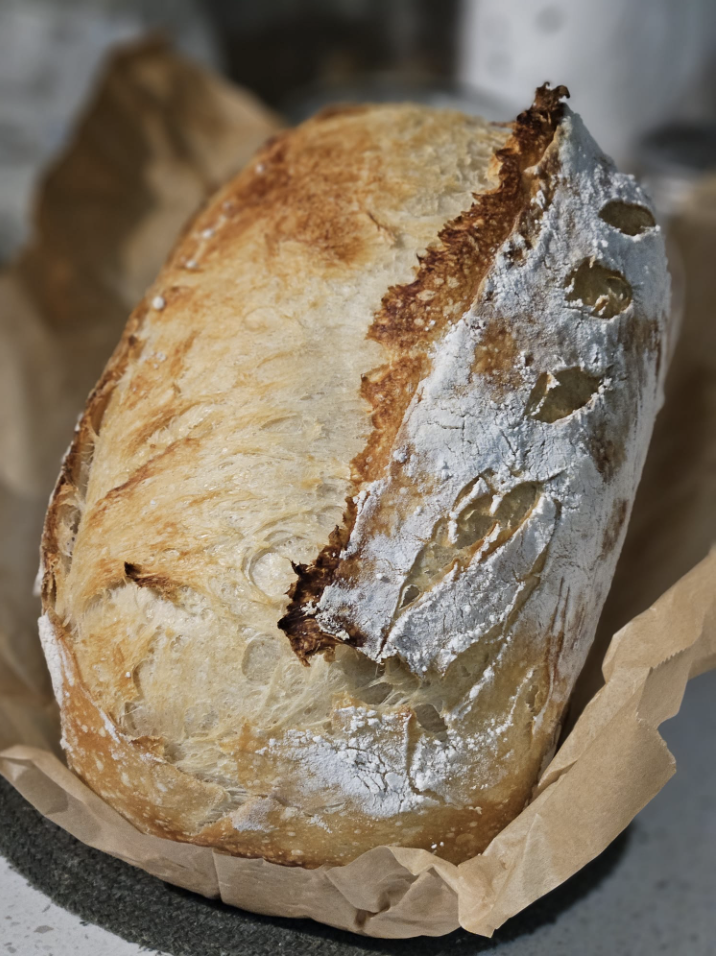
Simple Sourdough Boule Recipe
Master the Sourdough Boule (or Sandwich Loaf, No Judgment)
Alright, my sourdough acolytes—you’ve spent days feeding that jar of flour-water slurry sitting on your counter like a temperamental houseplant. You’ve named it, you’ve obsessed over its bubbles, and now what?
Time to actually bake something.
Welcome to your first sourdough recipe. This is the simple, foolproof loaf you will make again and again until you’re flexing on Instagram. Personally, I like to bake mine in a loaf pan because it gives you uniform, reliable slices for sandwiches (we eat a lot of sandwiches in my house, and I lack the patience for awkward, giant wedge-slices). But if you’re a purist chasing that traditional, crunchy, round Dutch-oven aesthetic? Go for the Dutch oven. You do you.
Let’s get baking.
This does require a little bit of planning, but once you get into the groove you will have your baking days and produce a loaf or two each week. My schedule looks like this:
9:30PM Feed starter 50g starter + 50g water + 50g unbleached all purpose flour
7:30AM Mix all ingredients together
8:00 AM – 10:00 AM: Stretch and fold every 30 minutes, resting in between.
10:00 AM – 4:00 PM
4:00 PM – Shape and second rise
7:30 PM – refrigerate for 1 hour.
8:30 PM – Bake
Print
Simple Sourdough Boule Recipe
- Total Time: 11 hours 15 minutes
Ingredients
320 grams room temperature water
12 grams sea salt
125 grams active sourdough starter
500 grams bread flour
Instructions
Time for some dough gymnastics. Wet your hands (unless you enjoy wearing dough like leather gloves). Grasp an edge of the dough, gently stretch it upward, and fold it back over its center. Rotate the bowl 90 degrees and repeat. Do this 4 times around the bowl.
Pro Tip: You’ll notice the dough getting tighter and harder to stretch as you go around. This is gluten building in real time. Good job.
Cover the bowl and let it chill out for another 30 minutes.
Repeat Step 4 every 30 minutes for 3 more rounds. That’s a total of 4 stretch-and-fold sessions over 2 hours. Your dough should be looking noticeably smoother and feeling more elastic by the end.
Step 7: Once bulk ferment is completed, turn your dough out onto a lightly floured surface. Gently stretch it into a rectangle-ish shape, fold half to the center and fold the other half over the top. Then roll it into gently into a ball.
Step 8: Lightly flour a tea towel and place it into a loaf pan, banneton, basket or bowl. Place the dough ball seam side up onto the towel and cover with the towel and put it in a plastic bag. Let proof again for 2 hours until puffy. Then place in the refrigerator for an hour or up to 2 days.
Step 9: Preheat the oven to 425 degrees, turn the dough gently onto a large piece of parchment paper, then pick it up by the sides and rest gently into the loaf pan. Score the top with a sharp knife or bread lane. Splash with a bit of water and cover with another loaf pan the same size to seal in the steam. Bake covered for 25 minutes. Then remove the cover and bake for another 20-25 minutes. Cool and enjoy.
- Prep Time: 10 hours 30 minutes
- Cook Time: 45 minutes
- Category: Dessert, Snack
- Method: Baking
Leave a Reply